
It’s time to look at how API requests can be tested. As with most topics in development, there are many ways to do this. For our setup lab, we will concentrate on what is probably the most popular tool for API testing - Postman. We will setup Postman client on your Windows Tools VM.
Note
Estimated time to complete: 5-20 MINUTES
This lab requires applications provisioned as part of the Windows Tools VM.
If you have not yet deployed this VM, see the linked steps before proceeding with the lab.
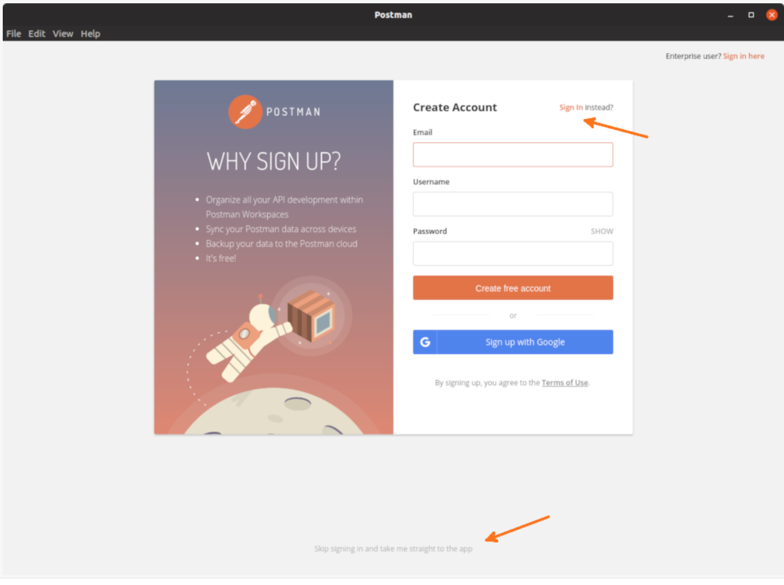
Please now start Postman for the first time. If this is the first time you have started Postman, you’ll be presented with a screen suggesting you create a Postman account. While this is not mandatory for the Nutanix Developer Marketing labs or even for Postman use in general, it can be a useful addition for using Postman on multiple machines.
If you already have a Postman account, please feel free to sign in using the Sign In link provided.
If you prefer to skip signing up and want to use Postman without an account, please click the Skip signing up and take me straight to the app link.
Note
The screenshot actions shown through this lab section will function the same way, logged in or not. Also, the screenshots shown were taken with Postman set to the ‘Dark’ theme. The theme can be changed by clicking the settings “spanner” icon and choosing dark from the Themes tab.
Although we could create an API request immediately, this lab is aimed at getting ready for upcoming labs and articles. For now, take note of the highlighted Request link, but please don’t click it, yet.
Instead, click the X button to close the currently open window.
The screenshot below highlights key areas that we’ll use in upcoming labs. These are the most important areas to be familiar with, although Postman has an enormous amount of functionality outside of “just” API requests.
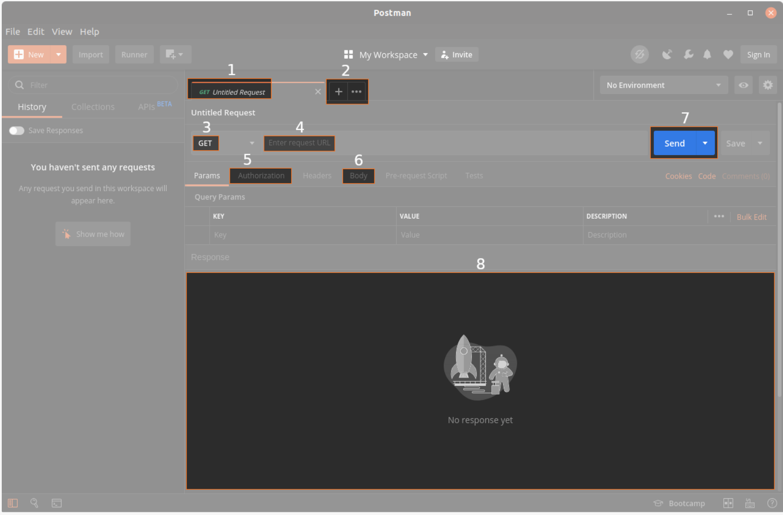
From 1 to 8, the highlighted sections are as follows.
- Each tab is contained within a request tab. This makes it easy to organise each request and its properties for later use.
- The + button is how we’ll create new requests. The … ellipsis button can be used duplicate the current tab, re-open recently closed tabs (and more).
- Showing GET right now, this is where we can change the request type. For example, common requests types are GET, POST, PUT and DELETE.
- The URL for the request. For example, Nutanix REST API requests typically start with something like this: https://<ip_address_or_fqdn>:9440/api/nutanix/<api_version_or_name>/<entity>
- The Authorization tab is where we can enter the username and password for our requests. When working with the Nutanix RESTS APIs, all requests are sent with Basic Authentication i.e. a username and password combination.
- The Body is where we can setup request “payload”. A request payload will typically contain parameters or additional information that a specific API request requires. An example could be the same of the new VM you are creating via API.
- The Send button does exactly what the name suggests. It takes all previously-configured settings and sends the request to the desired IP address or DNS name.
- Lastly, the large response field is where the JSON-formatted API response will be shown. Using the response field, we can see if the response was successful, if it failed, why it failed or, if everything went well, what the response itself contains.
With our new request created, we can submit the request and start parsing the response. Click Send now!
Note
If you receive an error saying Could not get any response, it is likely Postman is configured to require SSL certification verification (the default setting). To fix this:
- Click the Postman settings icon (spanner icon near the top-right corner).
- Select Settings.
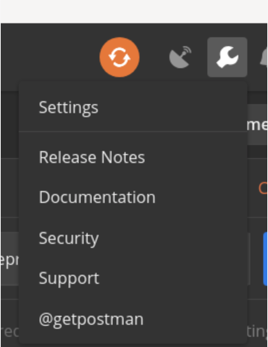
- Toggle off the setting labelled SSL certification verification.

- Click the dialog’s X button to close.